通过yum安装程序包最重要的一步就是指定yum仓库,今天我来教大家如何搭建自己的yum源服务器。
一、前期准备
准备两台Linux服务器,本文所用的服务器为CentOS6.9,及CentOS7.4服务器各一台,将演示CentOS7服务器作为yum源服务器,用CentOS6服务器进行yum访问。
二、开启CentOS7自动挂载光盘服务
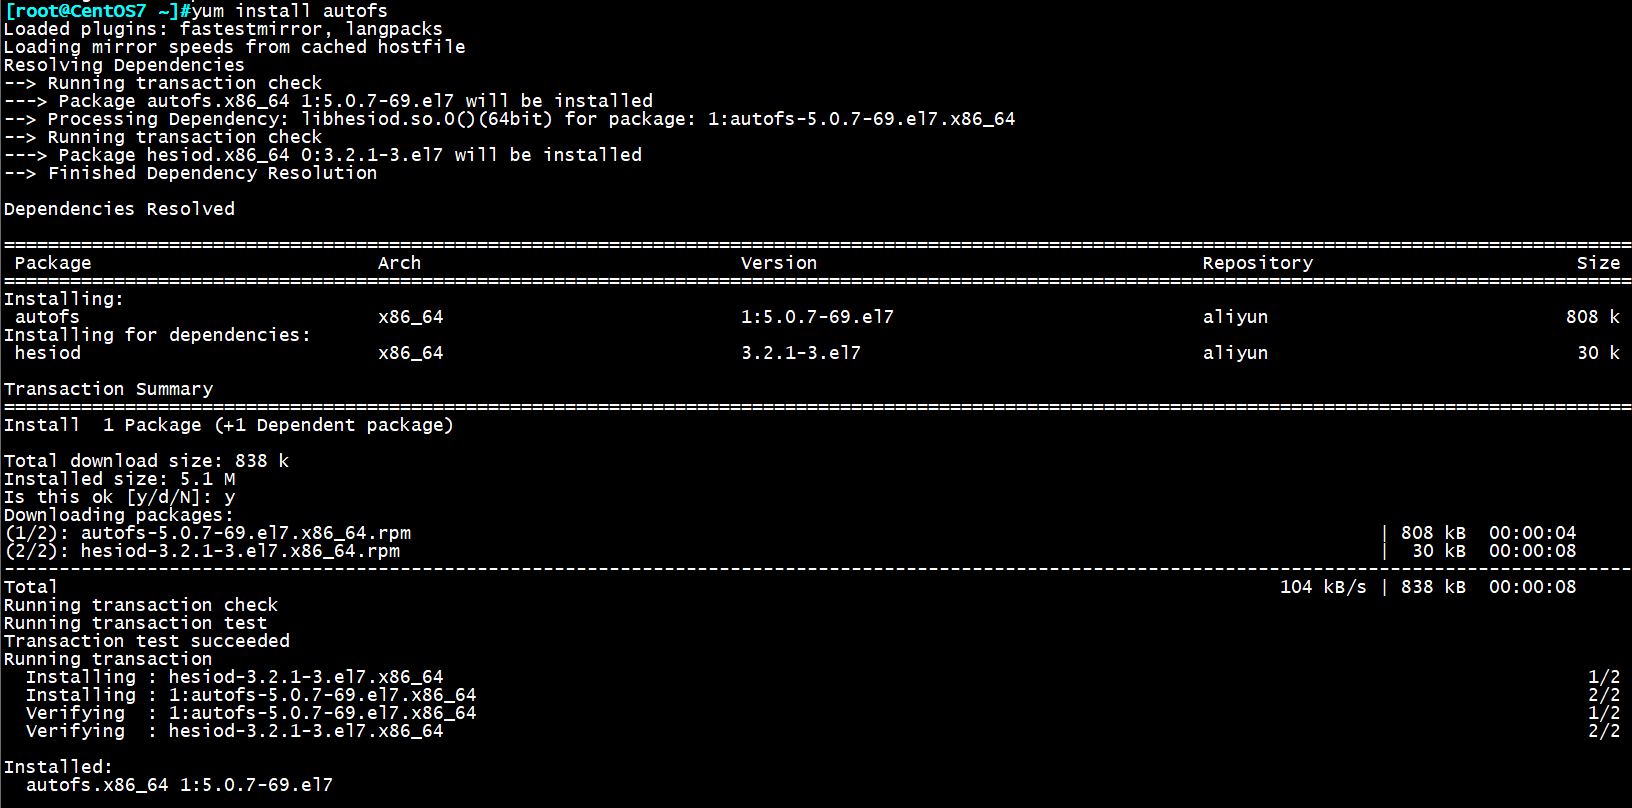
我们知道在CentOS6版本系统中,有一个“神奇”的目录/misc可实现光盘的自动挂载,但在CentOS7版本中默认并不支持此服务,需要我们进行手动安装autofs服务
yum install autofs 安装autofs包
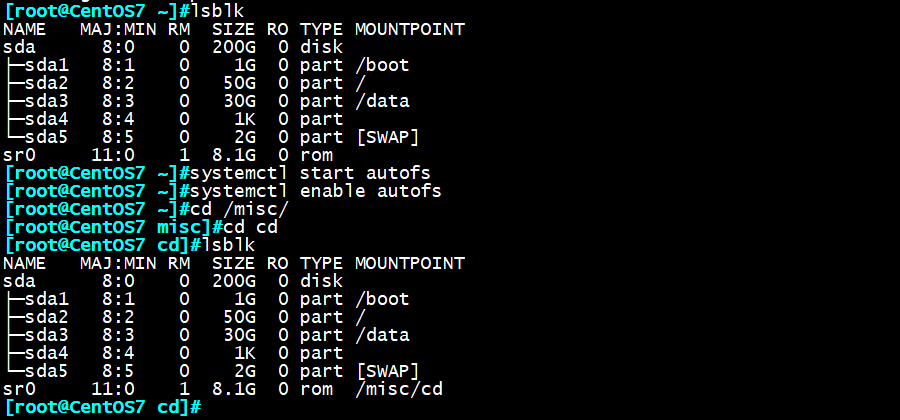
systemctl start autofs 开启自动挂载
systemctl enable autofs 下次开机默认开启自动挂载
三、关闭防火墙
要注意CentOS6版本与CentOS7版本关闭防火墙的命令有所不同:
CentOS6:
service iptables stop 关闭防火墙
chkconfig iptables off 下次启动时自动关闭防火墙
CentOS7:
systemctl stop firewalld 关闭防火墙
systemctl disable firewalld 下次启动时自动关闭防火墙
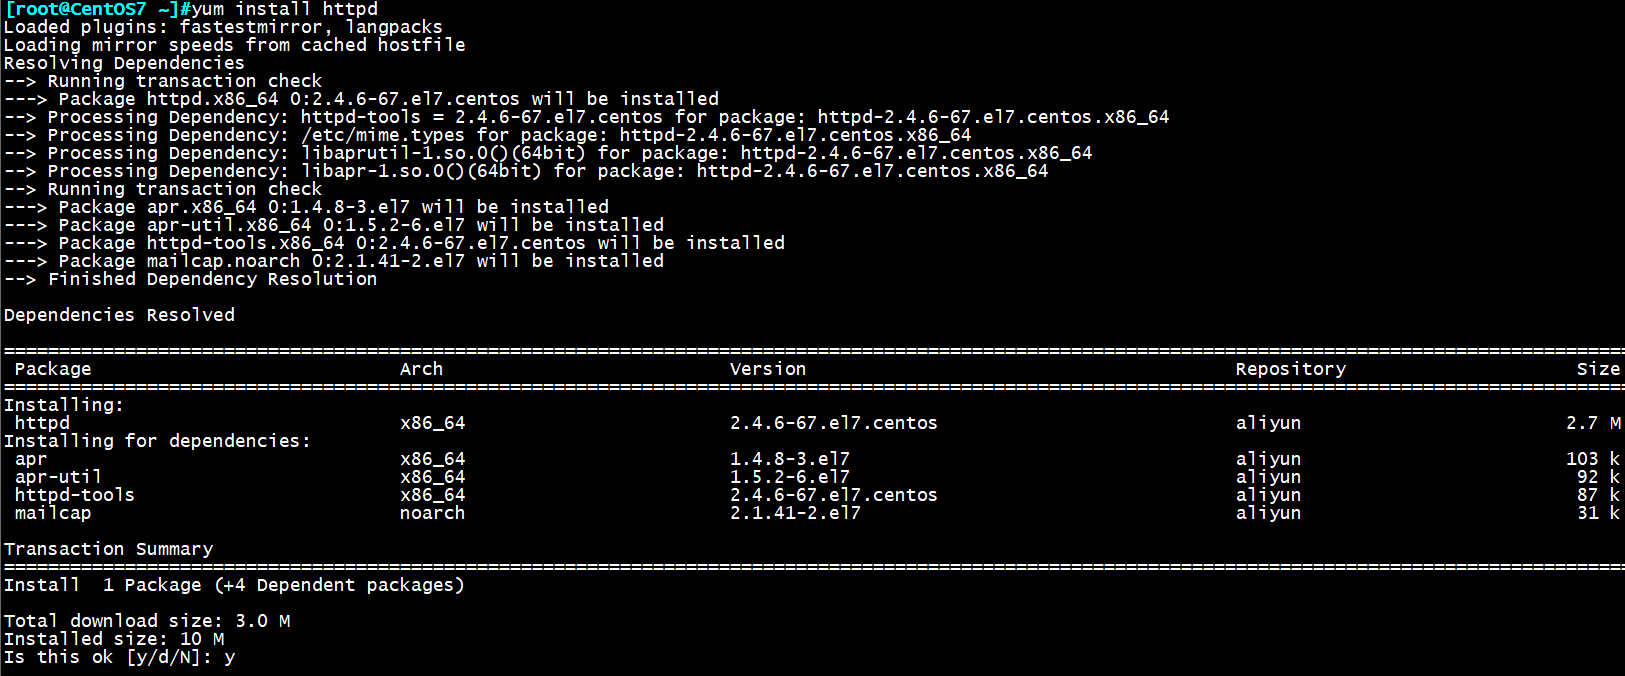
四、安装httpd服务
1 | yum install httpd |
五、开启httpd服务
1 | service httpd start |

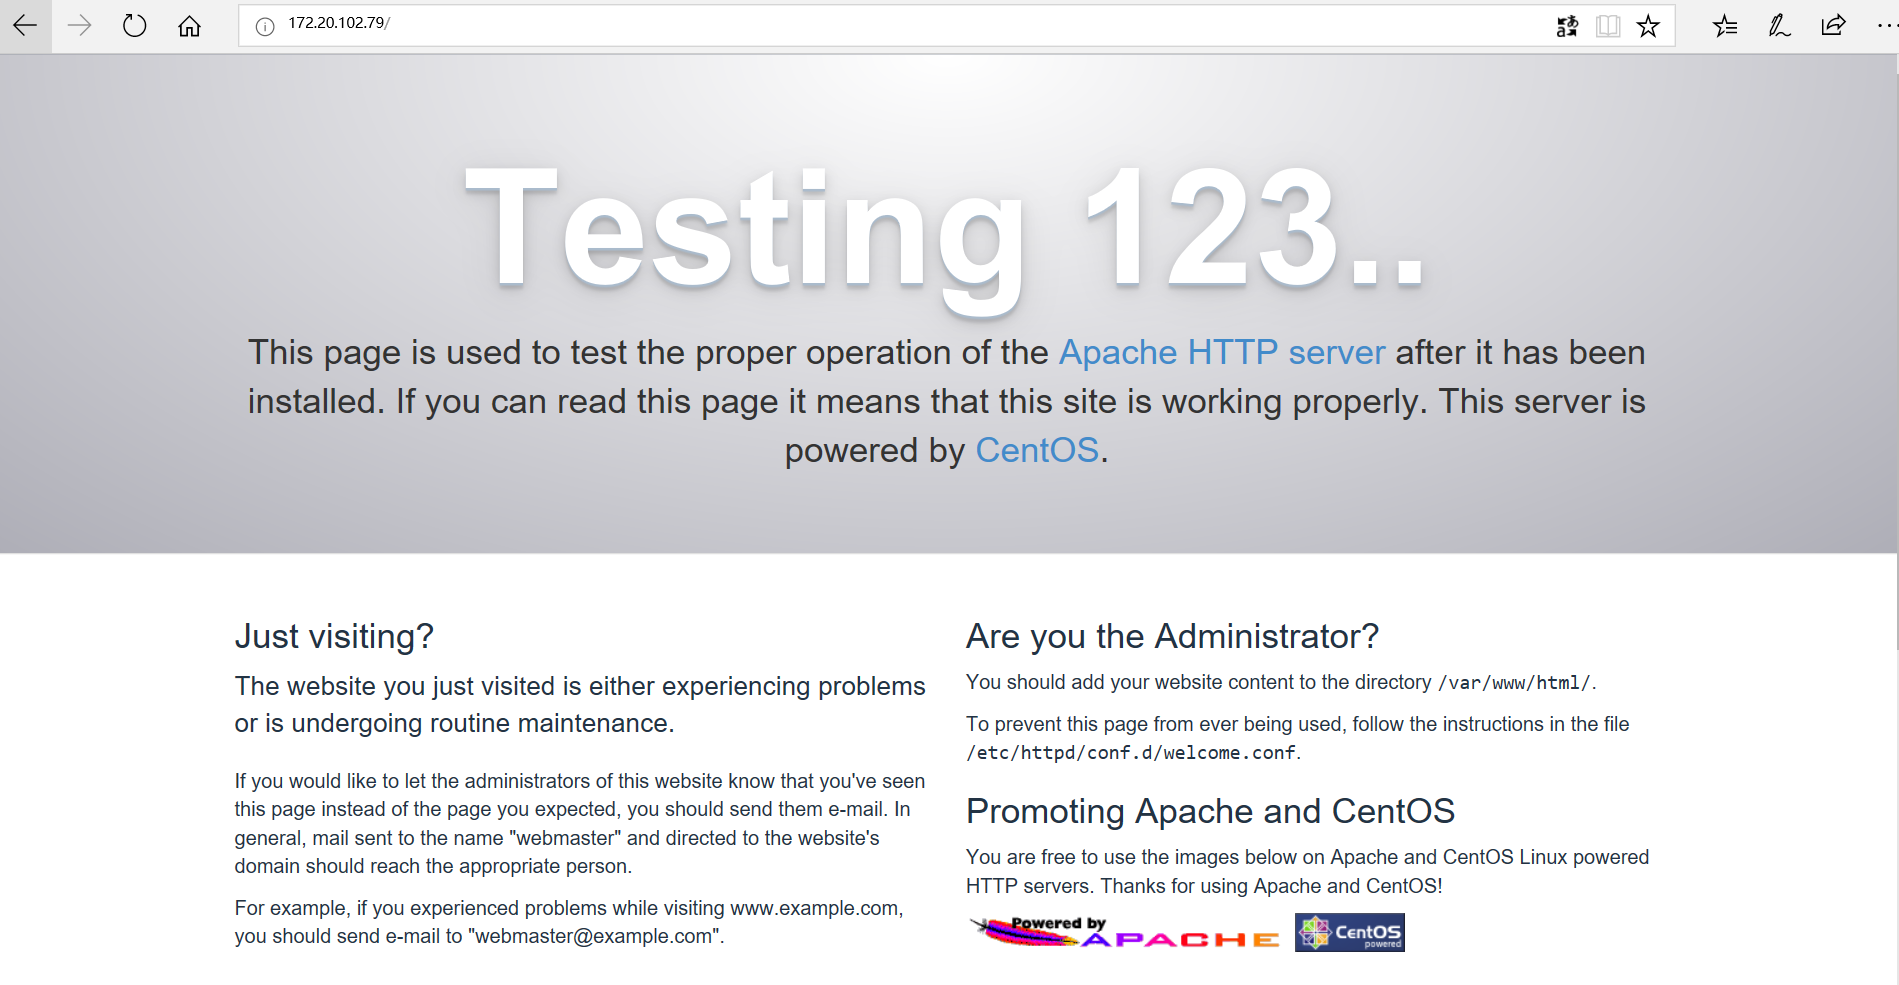
将本机ip地址输入浏览器,不出意外就能访问我们搭建的测试页面啦!
六、创建网页目录
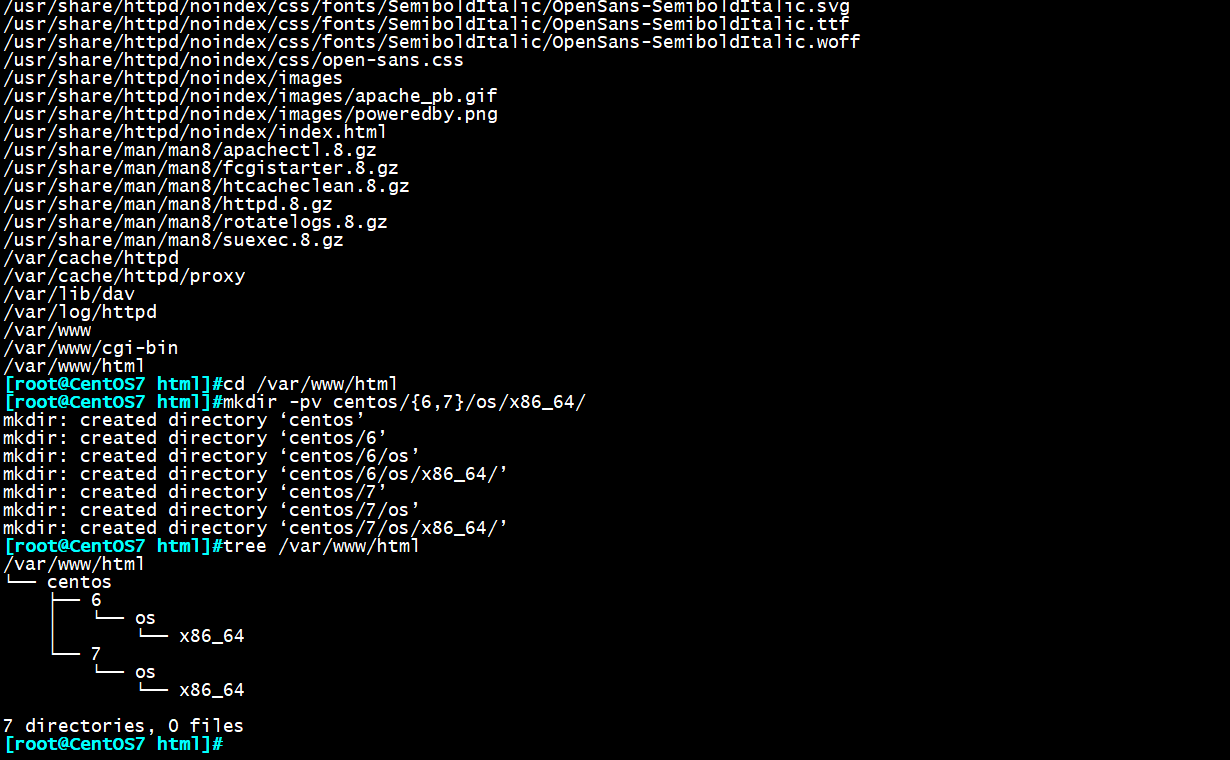
打开httpd包的文件列表,我们看到/var/www/html的文件夹,这里就是存放网页内容的目录了
rpm -ql httpd 查看httpd包的文件列表
cd /var/www/html 进入html目录
mkdir -pv centos/{6,7}/os/x86_64/ 创建挂载6,7yum源的目录
七、挂载yum源
mount /dev/sr0 /var/www/centos/7/os/x86_64/ 将6光盘挂载至6网络下
mount /dev/sr1 /var/www/centos/6/os/x86_64/ 将7光盘挂载至7目录下
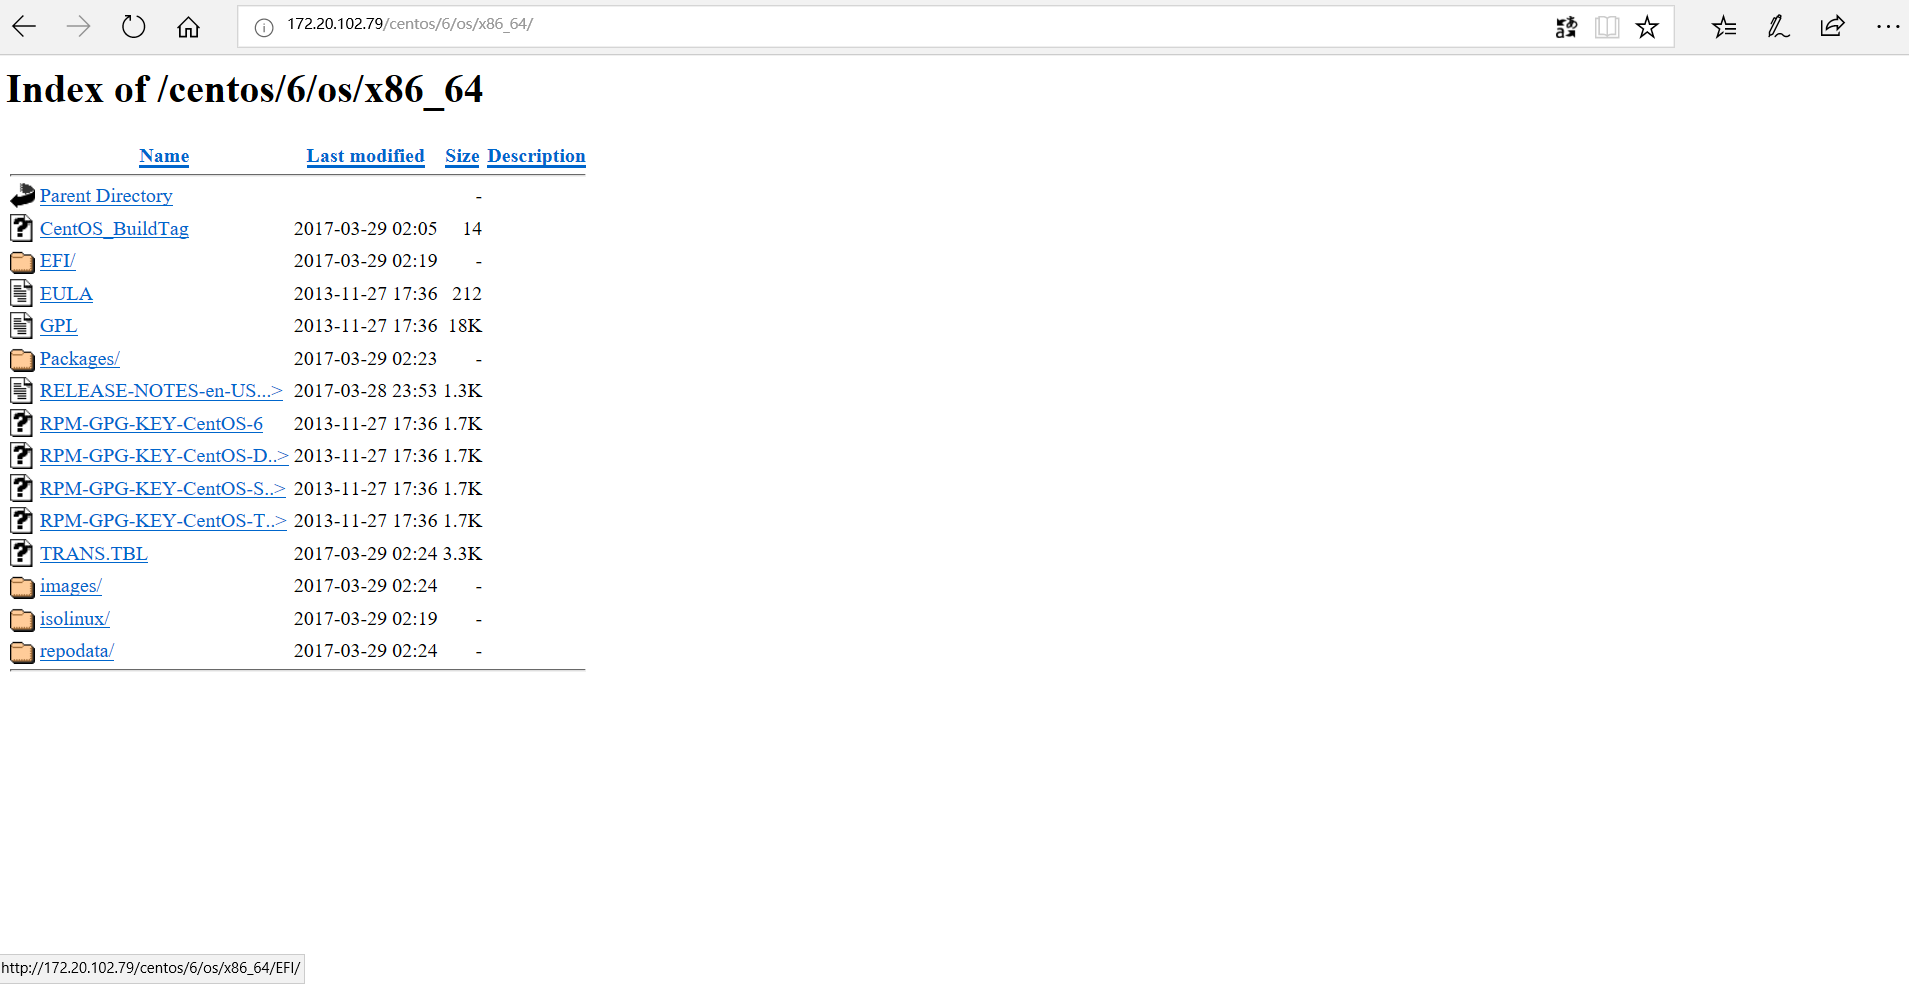
此时,在浏览器输入:ipadress/centos/版本号/os/x86_64/ 就能看到我们挂载的yum源了
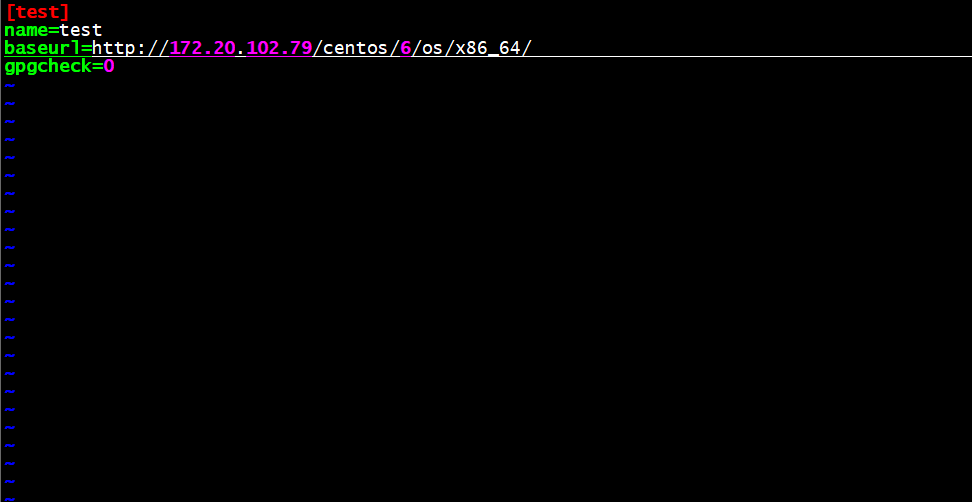
八、在CentOS搭建yum仓库
[test] 仓库名
name=test 描述名,不设置不影响包的安装,但会报错
baseurl=http://172.20.102.79/centos/6/os/x86_64/ 设置仓库地址链接
gpgcheck=0 默认为1,表示数字密钥安全检查,0表示不进行安全检查
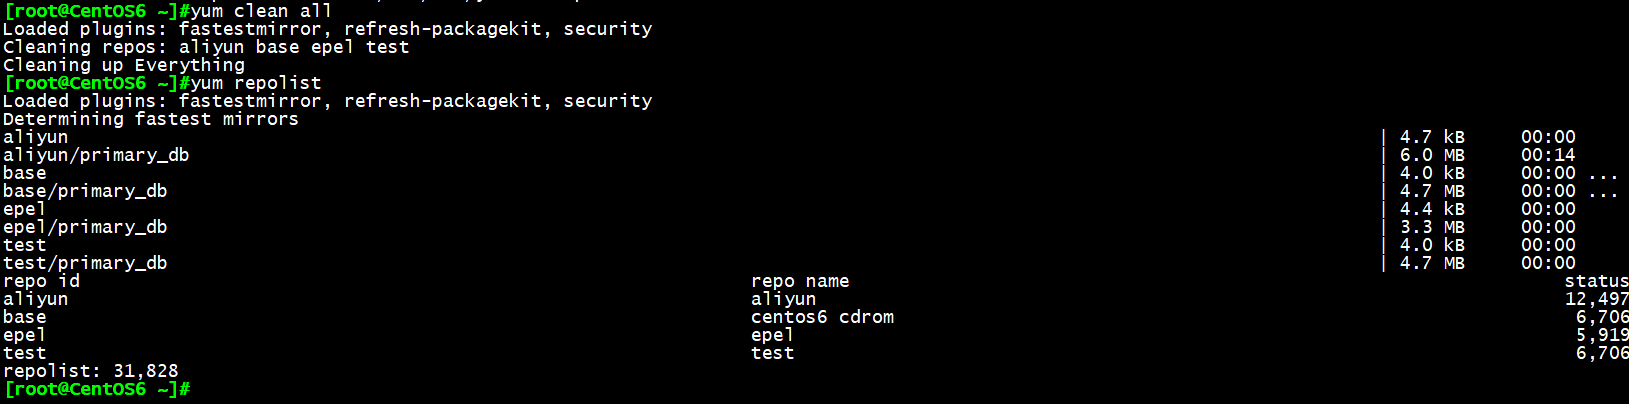
九、更新yum仓库
yum clean all 清空全部yum缓存
yum repolist 显示yum仓库列表
此时我们看到test仓库下已经更新出有6706个包列表,现在我们就可以通过自己搭建的yum源服务器来安装程序包了!